
I’ve been delaying an upgrade to our home Wi-Fi setup for a while now. Our previous solution used two separate non-coordinated Wi-Fi routers that provided close to whole-home coverage, but it wasn’t ideal.
I had to constantly switch back and forth between the two routers as well as 2.4GHz and 5GHz as I moved through the house. And we still had a few corners with weak signal. It was frankly a big hassle, but I was used to it.
And making any changes to our home Wi-Fi has always been painful. Even though I’ve spent most of my career working on internet access technology and products, I like most people have found it challenging to setup and configure a retail Wi-Fi home router. I’ve spent considerable time staring at confusing network configuration pages: IP Addresses, multiple layers of passwords, Wi-Fi channel configurations, etc. I know the technology under the hood of a Wi-Fi home router is quite complex, but do the makers of these products really expect typical consumers to understand this stuff?
And from running an ISP, I can say without any hesitation that home Wi-Fi is one of the most common reasons our subscribers reach out to us for tech support assistance.
I am happy to report that things are now changing. A new generation of whole-home Wi-Fi mesh systems is not only maturing but also becoming more affordable.
But what is mesh, exactly?
A Wi-Fi mesh network is a group of coordinated home router units that communicate wirelessly with each other to create a single Wi-Fi network that provides a blanket of connectivity. This allows you to have multiple sources of powerful Wi-Fi throughout your home, instead of just a single router.
Since Wi-Fi is broadcast from each Wifi point (and not just a single router), a mesh connected system provides better coverage over a wider space. The mesh system is flexible and scalable, so if you have a larger home, connect as many points as needed to get better Wi-Fi in every room.
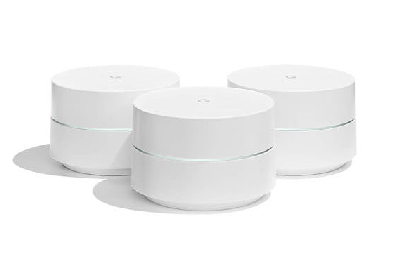
After hearing good reports about Google Wifi, I recently bought a 3-pack from Amazon for less than $300 (only slightly more expensive than a single high-end retail Wi-Fi router). Based on my past experience of problems and headaches with Wi-Fi setup, I set aside a few hours to complete this task and deal with any aftermath of the change.
But I am happy to report that Google Wifi setup was incredibly easy. The whole process took maybe 10-20 minutes at my house. Google has an intuitive app that I downloaded to my smartphone, and the rest was a matter of minutes. Google automatically handled all of the complex and confusing networking details, and it literally just worked straight out of the box.
Here are the basic steps:
1. Download and start the Google Wifi app on your smartphone.
2. From inside the app, login to your Google account. If you already have a Google account, this can be just a few clicks.
3. Take a photo of the QR code on the bottom of the first Google “Wifi Point” unit you unpack. The units are physically identical, so it doesn’t matter which one of the 3 units becomes your main unit.
4. Plug-in the first Google Wifi Point to your modem and to a power outlet.
5. Name your Wi-Fi network and create a Wi-Fi password.
6. Name the Wifi Point unit. Such as “Office” or “Family Room”
7. Plugin and name the 2nd and 3rd Wifi Points. Since the Wifi points talk to each other wirelessly, it’s not necessary to have wired connections for the 2nd and 3rd units. Although you may see higher speeds if you can connect the units with cat5e or cat6 cable providing gigabit speeds on the backbone.
And that’s all! Nothing more to do. Not only is my in-home Wi-Fi dramatically improved, but Google saved hours of my time. And the Google Wifi points are much more attractive than the multi-tentacled external antenna units that I previously had at home.